SPELL CHECKER ACTIVATION INSTRUCTIONS
WINDOWS 11, 10, OR EARLIER

MICROSOFT WORD 6
Activating your new speller is simple. Import a special dictionary from us to your word processing app. Then enable the special dictionary. Here, we provide the instructions how to do that. Please read the following instructions and then execute them using your word processing app. So open your word processing app now. Remember! Follow this set of instructions. Apply them in your word processing app. Let's get started.
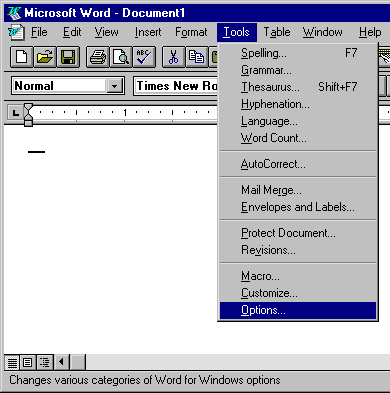
1. Run Microsoft Word 6, open a document, and select "Tools/Options."
2. In "Options", select "Spelling." Enable "Always Suggest." Disable "From Main Dictionary Only." In Custom Dictionaries, click the "Add" button, browse to the file path "C: > Users > Public > 01Inductel > spellers > Word6795" and add your new custom dictionary.
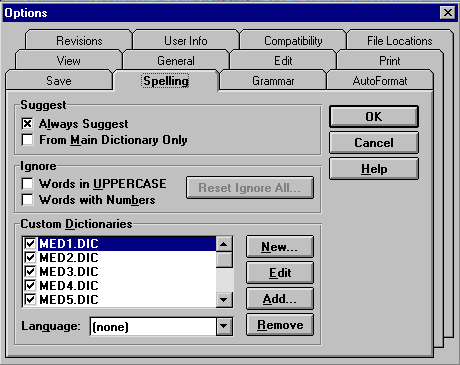
3. After adding your new custom dictionaries, put a check by each one you wish to have active during your spell check. Then click on OK to exit "Custom Dictionaries." You are ready to run a spell check. Please note, a maximum of ten custom dictionaries may be active at one time.
For information on other Inductel products, upgrades, etc., please visit the Inductel website at www.inductel.com . For technical support, please call Inductel at (408)655-5925, 9am to 5pm Pacific Time. Or send us an email at assistance.inductel@gmail.com 24/7. Or visit our "Help" page.