SPELL CHECKER ACTIVATION INSTRUCTIONS
WINDOWS 7, 8, 10, 11, OR VISTA

OPENOFFICE 4.x
Activating your new speller is simple. Import a special dictionary from us to your word processing app. Then enable the special dictionary. Here, we provide the instructions how to do that. Please read the following instructions and then execute them using your word processing app. So open your word processing app now. Remember! Follow this set of instructions. Apply them in your word processing app. Let's get started.
1. Set your Windows folder options to display hidden files and folders.
Windows 10
- In the search box on the taskbar, type "folder". Under Settings, choose "Show hidden files and folders."
- Under Advanced settings, select "Show hidden files, folders, and drives", and then select OK.
Windows 8.1
- Swipe in from the right edge of the screen, then select Search (or if you're using a mouse, point to the upper-right corner of the screen, move the mouse pointer down, and then select Search).
- Type folder in the search box, then select Folder Options
from the search results.
Select the View tab. - Under Advanced settings, select Show hidden files, folders, and drives, and then select OK.
Windows 7
- Select the Start button, then select Control Panel > Appearance and Personalization.
- Select Folder Options, then select the View tab.
- Under Advanced settings, select Show hidden files, folders, and drives, and then select OK.
Windows Vista
- Open the Control Panel.
- In the Search field, type folder.
- You'll see a section called Folder Options. Under that, click Show hidden files and folders.
- Find and tick the option marked Show hidden files and folders.
- Click OK.
2. Start OpenOffice. Exit OpenOffice. And Restart OpenOffice to create the wordbook folder if it does not already exist on your computer.
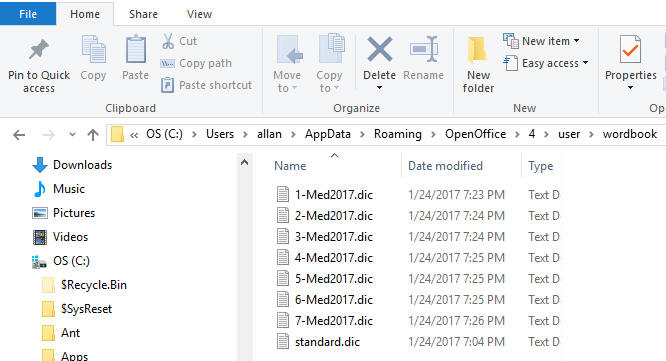
3. Open two folders: "C:\Users\Public\01Inductel\spellers\OpenOffice4" and "C:\Users\YourUserName\AppData\Roaming\OpenOffice\4\user\wordbook".

4. Copy the dictionaries from the OpenOffice4 folder to the wordbook folder.
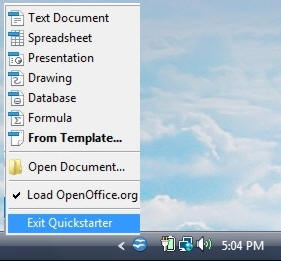
Windows Vista users: After copying the Inductel spelling dictionaries to the "wordbook" folder, be sure to exit "Quickstarter". "Quickstarter" is visible only in Windows Vista. It does not appear in either Windows 7 or Windows 8.x, or 10. The Quickstarter icon will be located in the Windows Vista Taskbar. It's the icon with the flying birds. Right click on the Quickstarter icon, and "Exit Quickstarter." You only have to exit Quickstarter this one time. After you have activated your Inductel custom dictionaries, you may ignore the Quickstarter. You do not have to deal with "Quickstarter in either Windows 7, 8, or Windows 10.
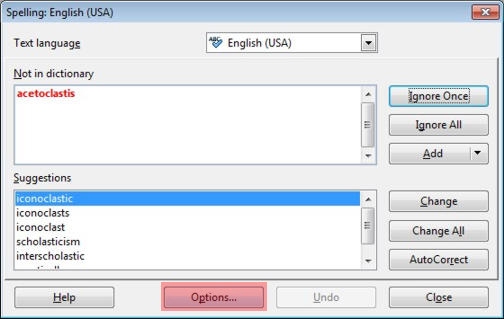
5. Open a document that you wish to spell check. From the "Tools" menu, run a spell check .

6. In "Spelling", click on "Options."
In "Options", place a check mark by each of the six "Med2017" user-defined dictionaries. (When spell checking small documents, you can have all six Inductel custom dictionaries active simultaneously. On large documents, 800 kb and above, you may have up to 2 dictionaries active simultaneously.)
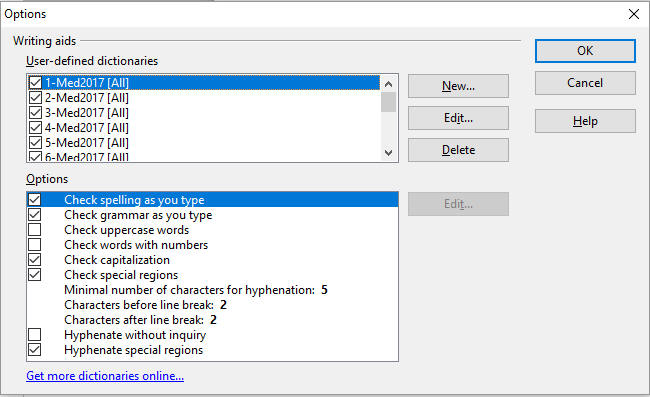
7. Done! Your Inductel spell checker dictionaries are now active. You may exit Options, and return to your document.
For information on other Inductel products, upgrades, etc., please visit the Inductel website at www.inductel.com . For technical support, please call Inductel at (408)655-5925, 9am to 5pm Pacific Time. Or send us an email at assistance.inductel@gmail.com 24/7. Or visit our "Help" page.